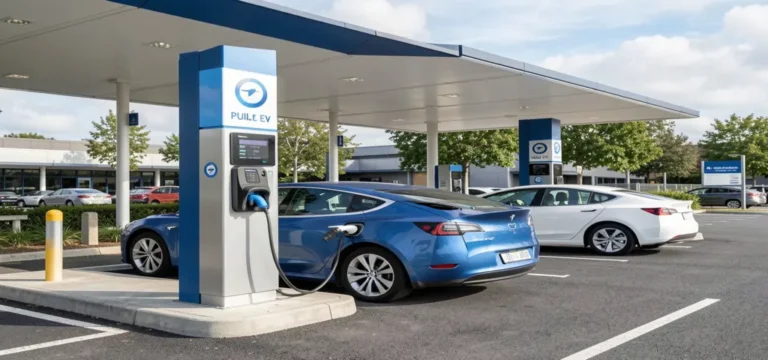
You’ll agree when I say that upgrading to a Level 2 home EV charger is more than a luxury; it’s a necessity you can’t ignore.
After all, from faster charging times to more convenience and no more scrambling to find a charging station during your morning rush, the benefits of upgrading are practical and handy.
But where do you start and can you DIY the installation?
These are the questions I am often asked by EV owners looking to install a Level 2 charger.
Now, the short answer is, yes you can DIY, but only to some extent.
In this blog, I’ve covered it all. Read on to know everything about how to install a Level 2 charger at home, including:
- What materials you need for charger installing and how much they cost
- What steps you need to follow
- Things you should check before charger installation
- When DIY is safe and when you should call in a licensed professional
Key takeaways
- You can do some prep work, but leave the electrical connections to a pro.
- Choose the right charger by matching your EV’s charging limits to the charger’s capacity.
- Check panel capacity and make sure your electrical panel can handle the extra load.
- Permits are a must as most cities and states require permits before installation.
- Save money by doing some prep work yourself (like clearing space or running low-voltage wires) and save on labor costs.
- Smart devices like simpleSwitch can help you avoid expensive electrical panel upgrades.
- After installation, have a local inspector check the work to ensure safety.
How to install a Level 2 charger at home?

For starters, installing a EV charger involves several steps, including checking your home’s electrical system, choosing the right Level 2 charger for your car, and more.
Also, you need thorough planning, handyman skills, and a basic knowledge of how EV charging works.
Now, although you can DIY some of the tasks, there are some things that should only be handled by a licensed professional
For instance, you can prepare the area for installation, but the important electrical components should be left to electricians to ensure safety and code compliance.
I’ve detailed how to install a Level 2 charger below with easy DIY steps and professional installation tips.
So, let’s have a look.
First of all, get the right components and tools
Before you start with installation, you should have all the essential charger components and tools.
Here are the common things you need for a typical Level 2 charger installing and their current prices.
| Item | Typical cost |
| Level 2 charger (40A/48A, Wi-Fi enabled) | $400-$1,200 |
| NEMA 14-50 outlet kit (if using plug-in) | $60-$200 |
| Circuit breaker (40A–60A double pole) | $40-$200 |
| Copper cable (8 AWG, 6 AWG depending on maximum amperes) | $0.80-$2.50/ft |
| Conduit, junction boxes, anchors, fittings | $50-$400 |
| Permit & inspection | $50-$500 |
| Licensed electrician labor (per job) | $400-$2,000+ |
| Panel upgrade (when needed) | $1,500-$6,000+ |
For a more detailed cost breakdown, you can read my blog on the cost of Level 2 EV charger installation.

No More $10k Electrical Panel Upgrade to Charge Your EV at Home
simpleSwitch lets you add a Level 2 EV charger to your home without an expensive electrical panel upgrade. Your EV charges safety without panel overload.
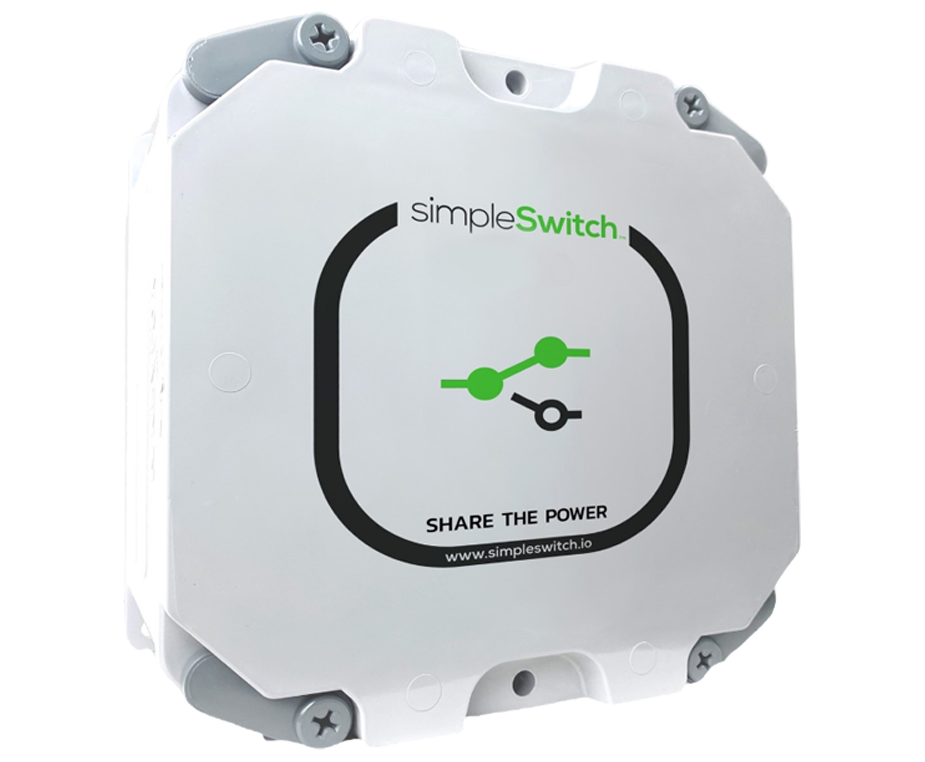
 30-day risk-free returns
- NEMA-rated
- Works with your existing panel
Now, follow these steps to install your Level 2 EV charger

I’ve listed all the installation steps that you can expect when an electrician comes to do the job.
So, if you’re doing it yourself, you’ll want to make sure you follow this order so that everything goes smoothly.
Let me break down all the steps for you.
Step 1. Calculate your home’s electrical load
The first thing you’ll do is assess your home’s electrical system. Here’s what you’ll check:
- Electrical panel: You will take a look at your existing electrical panel to make sure it’s in good shape and has enough capacity for the new charger.
- Distance between panel and charger: You will measure the distance from your electrical panel to where you want to install the charger. The farther away it is, the more materials and time it will take, which could increase the cost.
- Electrical load: You’ll calculate your home’s electrical load to figure out if your current system can handle the additional power demand from the charger. If your panel is overloaded or doesn’t have enough capacity, you might need an electrical load sharing device.
Step 2. Permits
Before any electrical work can begin,you usually need permits.
The electrician will take care of this for you. But for DIYers, you might have to apply for a Level 2 EV charger permit yourself.
Now, depending on where you live, getting the permit approved might take some time, and this could affect the overall installation schedule. So, be sure to handle permits ahead of time, even before you start buying charger components.
Step 3. Run the cable and conduit
Now comes the wiring part. Here, you will run the necessary electrical cables from your panel to the location where you want to install the charger.
Here’s what you’ll typically do:
- Conduit for protection: If the cable needs to run outside or in exposed areas, it will be protected by a conduit (a tube or pipe that houses the wiring). This is required to ensure the wires are safely protected from damage.
- Underground runs: If the wire needs to go underground, additional work like trenching (digging a trench to lay the conduit) might be required. This can add some time to the job, but it’s necessary for safety and code compliance.
You will also want to secure the conduit along the way to make sure everything stays in place.
Step 4. Mounting the charger and installing the outlet
Once the wires are run and the conduit is in place, the next step is mounting your charger. Here’s what it involves:
- Mounting the charger: You will mount the charger to the wall in the location you’ve chosen. Also, you’ll ensure that it’s securely fastened and that there’s plenty of space around it for ventilation and easy access.
- Installing the outlet (if plug-in): If you’ve got a plug-in charger (one that plugs into a NEMA 14-50 outlet instead of being hardwired), you’ll install the outlet in a convenient spot near the charger.
- Managing the cord: You will also want to make sure that any cords are organized safely, properly secured, and weatherproof if the charger is outdoors.
If you’re planning an exterior installation, it’s also worth understanding whether simpleSwitch is safe for outdoor installation and what weather-resistance features to look for when mounting EV charging equipment outdoors.
At this point, the charger is ready to connect to the electrical panel.
Step 5. Final connections in panel
This is where you will make the final and critical connections in the electrical panel, including:
- Double-pole breaker: You will install a double-pole breaker (which is required for a Level 2 charger). This breaker helps manage the flow of power to the charger and protects your home’s wiring in case of an overload or fault.
- Wiring connections: You will connect the power wires from the charger to the breaker and make sure all the grounding and bonding is done according to code. This is super important for safety, ensuring there’s no risk of electrical shock or fire.
- Circuit labeling: Finally, you will label the new circuit in the panel. This helps in the future if you need to do any maintenance or repairs, as it tells you exactly which breaker controls the charger.
Step 6. Testing and inspection
Once everything is connected, it’s time to power up the system. Here’s what you want to do:
- Initial testing: You will turn the system on and perform a test charge to make sure everything is working properly. Also, you will check the connections to make sure there are no issues and that the charger is operating at the right voltage.
- Inspection: After the system has been tested, a local inspector (if required by your local laws) will come to ensure that the installation meets all local codes and safety standards. This is a critical step because it ensures everything is set up correctly and safely.
Step 7. Walkthrough
Once the installation is complete, you will walkthrough the follow:
- Charger basics: You will see how to operate the charger, set up charging schedules (if applicable), and how to monitor your EV’s charging status.
- App setup: If your charger has a companion app, you will set it up and learn how to use it for things like remote charging or monitoring energy usage.
In short:
| Step | What to Do |
| Step 1: Assess Electrical Load | Check panel capacity, distance from charger, and electrical load. |
| Step 2: Apply for Permits | Confirm if you need permits for installation in your area. |
| Step 3: Run Cable & Conduit | Install conduit to protect wiring (underground or exposed). |
| Step 4: Mount Charger & Outlet | Mount charger securely; install NEMA outlet (if you’ve got plug-in charger). |
| Step 5: Final Electrical Connections | Install double-pole breaker and wire connections in the panel. |
| Step 6: Testing & Inspection | Test the system and schedule a local inspection (if required). |
| Step 7: Walkthrough | Learn how to operate the charger and set up any apps. |
And that’s it. With everything set up, you’re ready to charge your EV at home with ease.
Level 2 EV charger installation: What can you DIY and what you can-not?

As I said earlier, DIY Level 2 EV charger installation is possible, but only to a certain extent. And you’ll need to hire an electrician at some point.
After all, it’s a complicated job that involves obtaining permits, working through electrical panels, and ensuring code compliance.
Overall, here’s what you can DIY and when you need a professional:
What you can DIY:
- Picking the charger: You can choose a charger that matches your EV’s max amps.
- Preparing the wall: Find and mark studs, and pre-drill mounting holes so installation goes faster.
- Clearing or digging a path: If the cable needs to run outside, you can clear the route or dig a trench after utilities are marked.
- Running low-voltage lines (like Ethernet): This step is DIY-friendly and is good for boosting Wi-Fi signal to smart chargers. Just keep these away from electrical wiring.
- Cosmetic touch-ups: You can paint conduit, patch holes, make everything look clean once the install is done.
What you can-not DIY:
- Anything inside your electrical panel: Breakers, wiring, and live-panel work are dangerous and are best left for professionals.
- Grounding and bonding: These are critical safety steps that should be done correctly to prevent shocks or fires.
- Permit and inspection work: Electricians best handle permits and ensure everything passes code.
- Troubleshooting electrical issues: Voltage problems, load balancing, and wiring issues require professional expertise.
In short:
| DIY Tasks | Professional Tasks |
| Choosing the charger | Electrical panel work (breakers, live connections) |
| Preparing the wall (mark studs) | Grounding & bonding |
| Clearing space or digging trench | Obtaining permits & handling inspections |
| Running low-voltage lines (Ethernet) | Troubleshooting electrical issues |
| Cosmetic touch-ups (painting, etc.) | Final connections in the panel |
5 Things to check before you install a Level 2 EV charger

Before you install an EV charger, there are a few basics I suggest you check. In fact, do this upfront and it can save you money, prevent problems later-on, and make the whole installation way smoother.
All in all, here are the things you should check beforehand:
1. Parking location and distance from your main panel
The farther your car is from your electrical panel, the more wiring and labor you’ll need, which means higher costs.
So, measure the distance from your panel to your parking spot and think about the easiest path for wiring.
2. Your EV’s onboard charger limit
Your car can only accept a certain charging speed. For instance, if your EV maxes out at 32A, upgrading to a 48A charger won’t make it charge faster.
This is why I suggest you heck your EV’s charging specs before buying a charger.
3. Panel capacity and open slots
Even if your panel has empty breaker slots, it might not have the electrical capacity to support a new circuit.
Here, an electrician will need to do a quick load calculation. Older or full panels might need upgrades, so it’s good to know this early. In cases where capacity is tight, installing an EV charger load management system can allow safe charging without replacing your panel.
4. Rental or HOA rules
If you rent or live in an HOA community, your local rules might mandate your landlord to allow EV charging.
But that’s not true everywhere and, depending on your location, you might need permission before installing anything electrical or visible outside.
5. Local permit requirements
Most places require a permit for installing an EV charger. And even though electricians usually handle this for you, they don’t always do it.
So, do confirm who’s pulling the permit before work starts.
Bonus: You need not upgrade your electrical panel for Level 2 charger installation
Your electrician might tell you that you need a full panel upgrade. But that’s often avoidable, all you need is an energy management device.
Devices like simpleSwitch are UL-listed. And they monitor your home’s electrical load, automatically managing power sharing between EV chargers and other high-power appliances.
No More $10k Electrical Panel Upgrade to Charge Your EV at Home
simpleSwitch lets you add a Level 2 EV charger to your home without an expensive electrical panel upgrade. Your EV charges safety without panel overload.
- 30-day risk-free returns
- NEMA-rated
- Works with your existing panel
Conclusion
By now, I am sure you know how to install a Level 2 charger at home by yourself. Also, I am sure you know what you can DIY and what you can-not.
Got more questions or need an energy management system to avoid an expensive panel upgrade?
You can get in touch with us!
At simpleSwitch Io, our energy management devices offer safe EV charging and are designed to automatically balance power between EV charger and other home devices.
Simply put, our energy management system is what you need to save extra thousands of dollars in utility upgrades during Level 2 charger installation.
FAQs about how to install a Level 2 charger at home
Can I install a Level 2 charger myself?
You can definitely handle some of the prep work, but the final electrical connections and panel work need to be done by a licensed electrician in most places.
Here’s what you can safely do on your own:
- Prep work: This includes tasks like mounting the charger, clearing the route for wiring, digging trenches for outdoor cables (if needed), or even running low-voltage communication wires for Wi-Fi connections.
- Electrical work: When it comes to connecting the charger to your electrical panel, installing breakers, grounding the system, or handling anything that involves live electrical connections, you’ll need to bring in a pro. This is for your safety as working with electricity can be dangerous if you don’t have the proper training.
In short: Stick to the easy stuff, and leave the high-voltage electrical work to the experts.
How much does a Level 2 charger installation cost?
The total cost of a Level 2 charger installation can vary quite a bit depending on your home’s setup.
On average, you can expect to pay anywhere from $900 to $3,500+.
Here are some factors that can influence the price:
- Proximity to your electrical panel: If your charger is located close to your electrical panel, installation will generally be cheaper because the electrician won’t need to run long wires.
- Panel upgrades: If your electrical panel needs an upgrade to handle the extra load from the charger, the cost can go up significantly. Panel upgrades can range from $1,500 to $6,000, depending on the complexity of the upgrade and the age of your system.
While it’s a big upfront investment, having a Level 2 charger installed at home can save you a lot of time and hassle in the long run.
How long does the installation take?
The time it takes to install a Level 2 charger can vary based on the complexity of the job. Here’s a rough breakdown of how long different types of installations usually take:
- Simple outlet install: If you’re installing a plug-in charger with a NEMA 14-50 outlet, the job can typically be done in 2 to 6 hours. This is the quickest option because it doesn’t involve any major electrical work or modifications.
- Hardwired near-panel: For a hardwired charger (installed directly into the electrical system) that’s located close to the electrical panel, the installation might take 3 to 8 hours. This includes running the wiring, installing the breaker, and connecting everything securely.
- Trenching/panel upgrades: If your installation requires trenching (for underground cables) or an upgrade to your electrical panel, the job could take multiple days. You might need to wait for permits, utility work, or inspections. This type of install could stretch over a week or more, depending on your local regulations and the complexity of the work involved.
Do I need a permit for Level 2 EV charger installation?
Yes, in most places, you’ll need a permit to install a Level 2 charger. This is to ensure the work is done safely and meets local building and electrical codes.
Here’s how it works:
- Permit process: Typically, your electrician will handle the permit application for you. They will apply for the permit, and sometimes an inspection will be required once the installation is complete to make sure everything is up to code.
- Local regulations: Permit requirements can vary by city or county, so be sure to check with your electrician or local authorities about the specific rules in your area.
Don’t skip this step as installing without the proper permits can lead to legal issues. Also, you might not be able to sell your home or make insurance claims if something goes wrong later.
Can I add Level 2 charging without upgrading my panel?
In many cases, yes!
It’s possible to add a Level 2 charger without upgrading your electrical panel. You can use a smart energy management device like simpleSwitch.
These devices can help balance the load on your home’s electrical system. They monitor your power usage in real-time and adjust the power going to your EV charger to ensure you don’t exceed your home’s capacity.
So, even if your panel isn’t the newest or most powerful, you can still install the charger and avoid overloading the system.
What wire size and breaker do I need for Level 2 charger installation?
Here’s a quick guide:
- Wire size: The wire size depends on the ampacity (the maximum current your charger will draw). The general rule of thumb is:
- 8 AWG copper wire for 40A circuits.
- 6 AWG copper wire for 50A or 60A circuits.
- Breaker size: The breaker is also determined by the charger’s capacity. Common configurations include:
- 40A breaker for chargers with a maximum of 40 amps.
- 50A breaker for chargers that can handle up to 50 amps.
It’s important you confirm the correct wire size and breaker requirements with your charger’s manufacturer and check your local electrical codes (NEC) to ensure everything meets the requirements.